

“Get a system that works in summer and winter, that’s what a heat pump gives you.”
And how can you achieve this? By understanding the whole heat pump installation process. You may think, Why must you bother? Just call experts at Apollo Air Heating & Cooling and get the installation done. But you must be aware that heat pump installation quality determines how well the system will run, how much you’ll pay in electric bills, and how long it lasts.
In a place like San Antonio, where winters are mild but summers get intense, a well-installed heat pump gives you year-round control with lower energy bills. Today, we will decode the whole process and help you get familiar with each and every step, helping you get a clear picture of what must be done and what can be avoided.
Why Must You Know the Installation Process
The average heat pump cost in San Antonio ranges between $6,000 and $12,000, depending on several factors:
- System size and brand
- Duct condition or replacement needs
- Installation complexity
- SEER and HSPF efficiency ratings
While choosing the cheapest bid might look appealing, poor installation often leads to higher energy use, noise issues, and early system failure.
A professional heat pump installation, on the other hand, ensures optimal performance, better comfort, and a longer system lifespan, often 12–15 years or more with regular maintenance.
Understanding the process helps you make informed decisions, ask the right questions, and protect your investment in home comfort.
Steps You Must Know About the Heat Pump Installation Process
We know that with all the heat pump benefits, you can turn your home into a comfortable space year-round, keeping your family cozy in winter and cool in summer. But performance depends on how it’s installed.
Here’s a clear look at the installation process most San Antonio HVAC experts follow to ensure your system runs efficiently from day one.
Step 1: Pre-Installation
Follow Safety Codes
Every installation must comply with national, state, and local regulations. Only licensed HVAC professionals should perform this work. Electrical connections, refrigerant handling, and pressure testing all require certified technicians.
Inspect and Verify Equipment
Before starting, the installer should:
- Confirm the unit is correctly sized for the home’s load requirements
- Verify all components are included and undamaged
- Review the manufacturer’s installation data (physical and electrical specs)
Prepare the Site
For the outdoor unit, ensure ample clearance for airflow and service access. Avoid tight enclosures or shaded corners that restrict performance.
The indoor air handler needs structural support, easy duct connections, and space for filter maintenance.
Proper site preparation directly impacts long-term efficiency and serviceability.
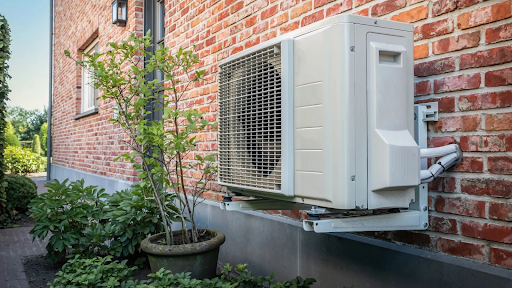
Step 2: Outdoor and Indoor Unit Installation
Outdoor Unit Placement
- Mount the unit on a level, stable pad or bracket
- Raise it slightly above ground level to prevent flooding or debris
- Maintain at least two feet of clearance on all sides
- Use vibration pads to minimize noise transfer
Indoor Unit Setup
- Position the air handler or coil in a conditioned space or utility closet
- Ensure proper airflow from return and supply ducts
- Seal joints tightly to prevent leaks and loss of static pressure
Ductwork Connection
All ductwork should follow ACCA Manual D design standards. Leaky or undersized ducts can waste up to 30% of system efficiency.
The installer should inspect, repair, or replace sections as needed and seal all joints with mastic or metal tape.
Step 3: Refrigerant Lines and Electrical Wiring
Refrigerant Lines
- Connect indoor and outdoor units using insulated copper tubing
- Keep the lines sealed until ready to connect
- Moisture contamination can cause compressor damage
- Insulate both lines separately to prevent heat gain or condensation
- Check for tight, leak-proof brazed joints
Electrical Wiring
- Follow the manufacturer’s wiring diagram precisely
- Run dedicated power and low-voltage control wiring
- Ground all circuits properly
- Verify voltage and amp ratings match the equipment requirements
Clean wiring not only looks professional but also reduces the risk of malfunction or electrical failure.
Step 4: Condensate Drainage System
Even in heating mode, your system creates condensation that must be properly drained.
- Install a condensate line from the indoor coil to a drain or exterior outlet
- Maintain a continuous downward slope
- Insulate the line in humid or warm areas to prevent dripping
- Test the flow by adding water to the drain pan
A blocked drain can cause water leaks, mold growth, and system shutdowns, one of the most common preventable HVAC issues.
Step 5: System Commissioning and Testing
Commissioning confirms everything works as intended before the technician leaves the site.
Charging the System
Factory refrigerant charge is rarely enough for real-world installations. The technician calculates additional refrigerant based on the total line length and verifies using pressure and temperature charts.
This step ensures correct subcooling and superheat levels for maximum efficiency.
Operational Testing
- Power up the system and check all electrical circuits
- Inspect refrigerant lines for leaks
- Test condensate drainage
- Run the heat pump in both heating and cooling modes
- Verify defrost and backup heat functions
- Confirm proper airflow and temperature differentials
A fully tested and maintained HVAC system performs at its rated efficiency, giving you the comfort and savings you paid for.
Step 6: Smart Thermostat Integration and Cleanup
Smart Thermostat Setup
Modern systems pair with Wi-Fi programmable thermostats to manage heating, cooling, and defrost modes efficiently.
The installer programs settings for:
- Emergency and auxiliary heat
- Defrost cycle coordination
- Adaptive temperature scheduling
This allows energy optimization and better remote control via smartphone apps.
Cleanup and Waste Removal
A professional team removes all leftover materials, copper scraps, wiring, and packaging.
They clean the worksite, verify airflow around the unit, and present system documentation, including warranties and manuals.
Step 7: Final Verification and Homeowner Handoff
Lastly, in the process of the HVAC installation guide, the technician performs a final inspection:
- Confirms all readings are within manufacturer specifications
- Checks for unusual noise or vibration
- Reviews maintenance tasks with the homeowner
- Demonstrates thermostat use and explains filter changes
This step completes the installation and ensures the system runs safely, efficiently, and within warranty standards.
Expert Heat Pump Installation Tips For San Antonio Homes
Here are a few key HVAC installation tips that make a big difference:
- Always use licensed HVAC professionals.
- Ensure ducts are sealed, insulated, and properly sized.
- Keep outdoor units clear of shrubs, fences, or debris.
- Schedule maintenance at least twice a year.
- Don’t skip professional commissioning, it’s your guarantee of efficiency.
These practices protect performance and extend the life of your system.
Bottom Line
Every stage of heat pump installation impacts your system’s efficiency, comfort, and lifespan. When your HVAC is done right, it runs quietly, keeps indoor temperatures steady, and helps lower energy bills all year. It’s always smart to consult a qualified HVAC expert for installation, but with this guide, you’ll understand the process clearly and make each step more meaningful.
Are you looking for reliable heat pump or furnace installation in San Antonio, TX? Apollo Air Heating & Cooling delivers integrity, reliability, and quality every time. Our HVAC service in San Antonio, TX, installs your system with precision so you get consistent comfort and lower bills year-round.
Call 210-888-8417 or Book Online Now to schedule your installation today.
FAQs
How Long Does a Heat Pump Installation Take?
Most residential heat pump installations in San Antonio take one full day. Larger or more complex systems may require two days for setup, testing, and smart thermostat calibration.
What’s the average cost of heat pump installation in San Antonio?
On average, installation costs range from $6,000 to $12,000, depending on the system size, ductwork, and efficiency rating. A professional quote ensures accurate pricing.
Do I need new ductwork for a heat pump?
Not always. If your existing ducts are clean, sealed, and properly sized, they can often be reused. Your technician will inspect and confirm during the pre-installation stage.
How do I know what size heat pump my home needs?
Sizing depends on your home’s square footage, insulation, and layout. An HVAC expert performs a load calculation (Manual J) to choose the right capacity for efficient performance.
Can heat pumps handle both heating and cooling in Texas?
Yes. Modern heat pumps efficiently cool your home in summer and warm it in winter, making them ideal for San Antonio’s mild climate.